Page 1 of 2
Italeri 1/72 Fiat CR.42 Falco
Posted: Wed Jan 13, 2010 3:52 am
by warhawk
Hi everyone! Here's my latest project

Italeri kit has many plus sides:
- nicely printed decals
- very useful reference booklet
- large number of options
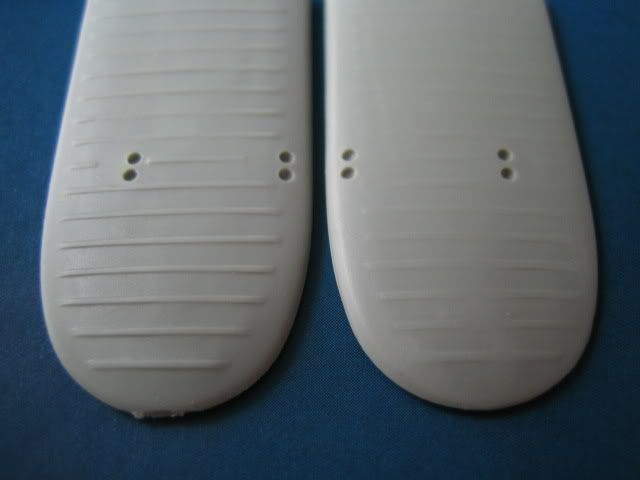
Although it's the best CR.42 kit in 72nd, there are a few minor complaints
- Decal instrument panel and seatbelts (I hate this the most in modelling)
-
Propeler is faced the wrong way (just move the axis on the oposite side)
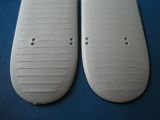
- Rib and panel lines on the wings too heavy
- Thick trailing edge (although not as serious as in short-run kits)
The ribs were fixed with a few light passes with a '1000' sanding paper
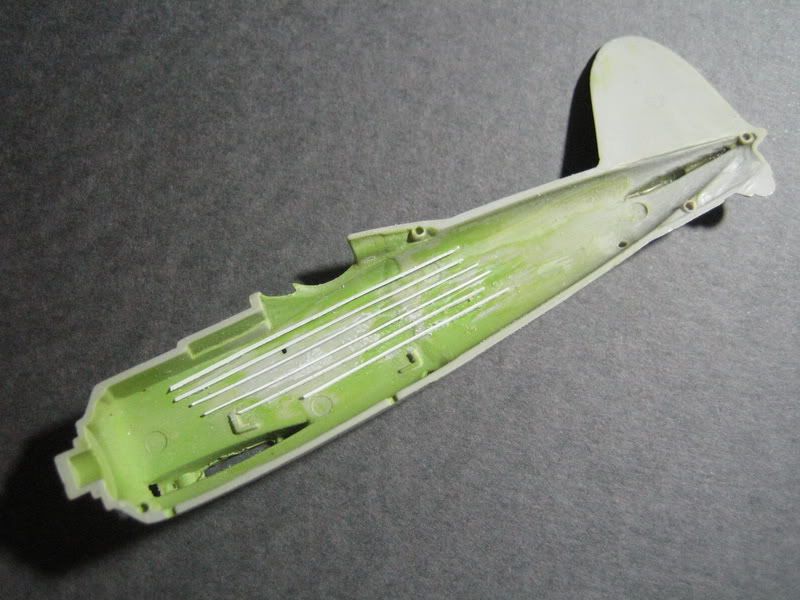
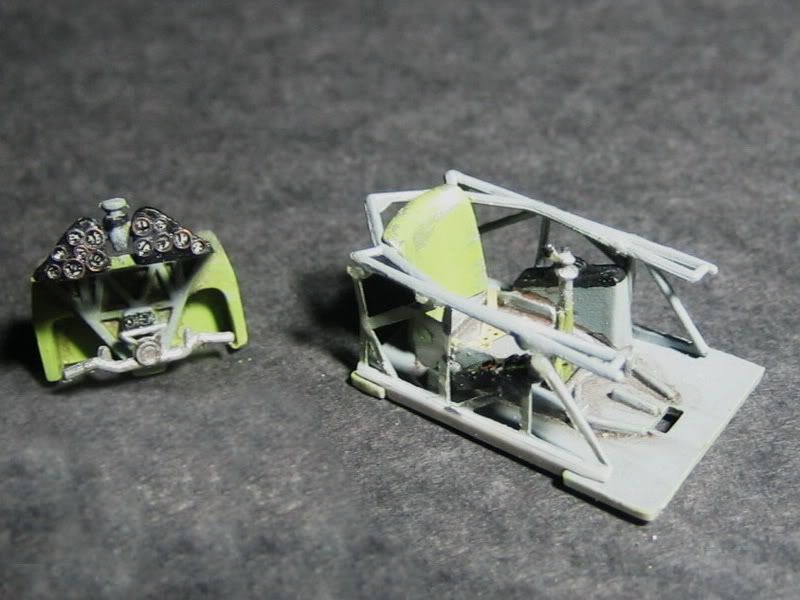
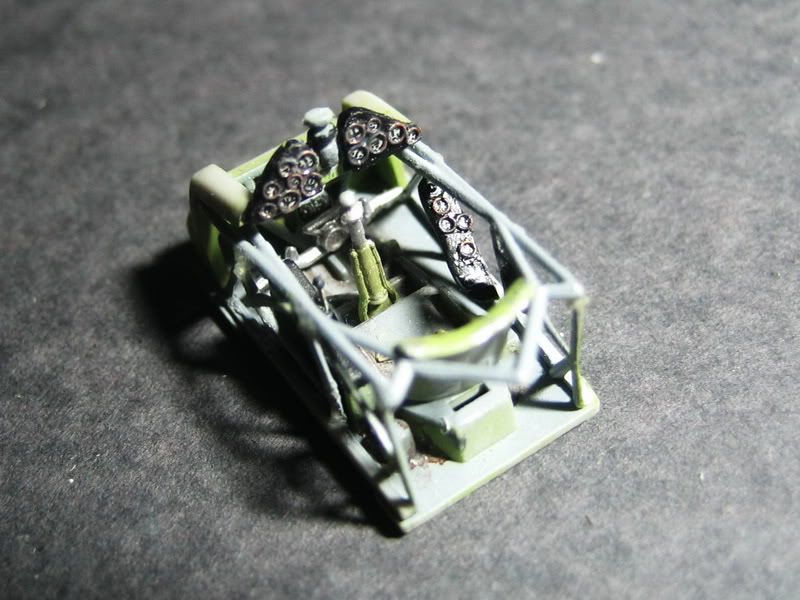
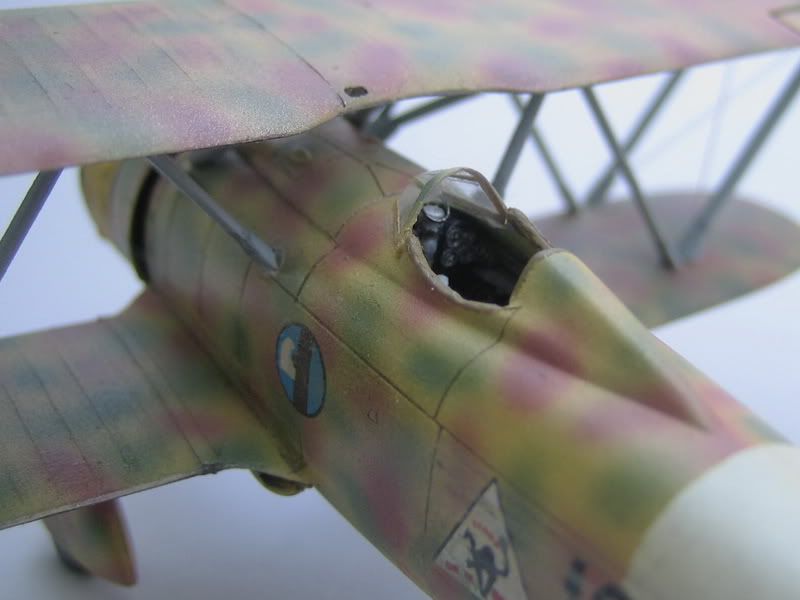
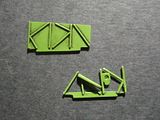
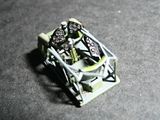
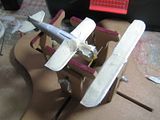
The framework looked nice, but when painted, I decided it woud be better to see through it, so I sanded it from the back until only the framework was left. Then some structure was added to the fuselage sides...
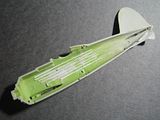
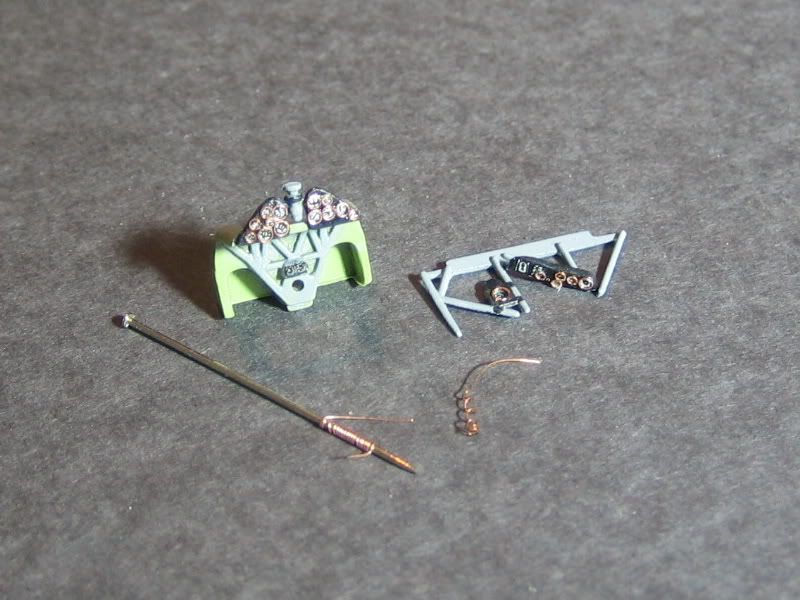
I added instrument bezels made out of fine wire. I just wrapped it around a toothpick or something else depending its radius and voila - many perfect circles!

Seatbelts were "borrowed" from AML' G.50 (i'll find a replacement later for it)
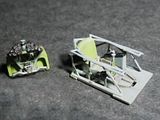
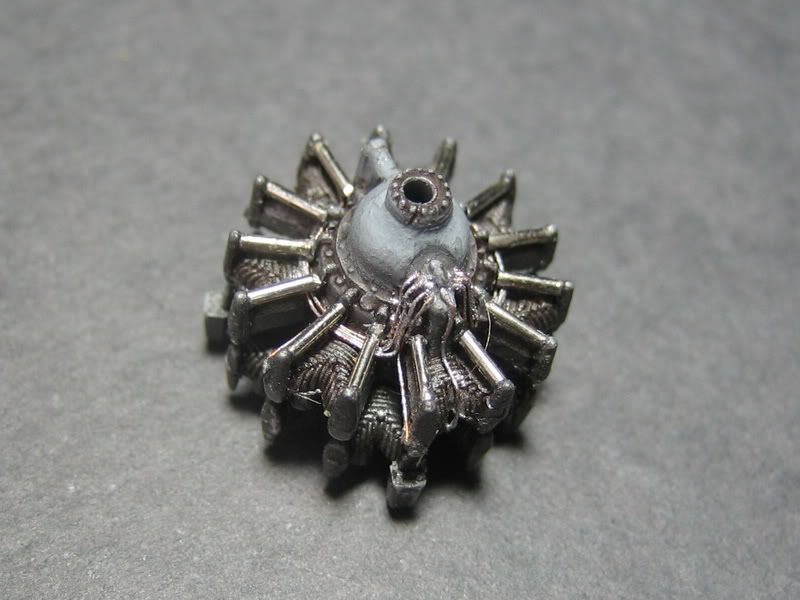
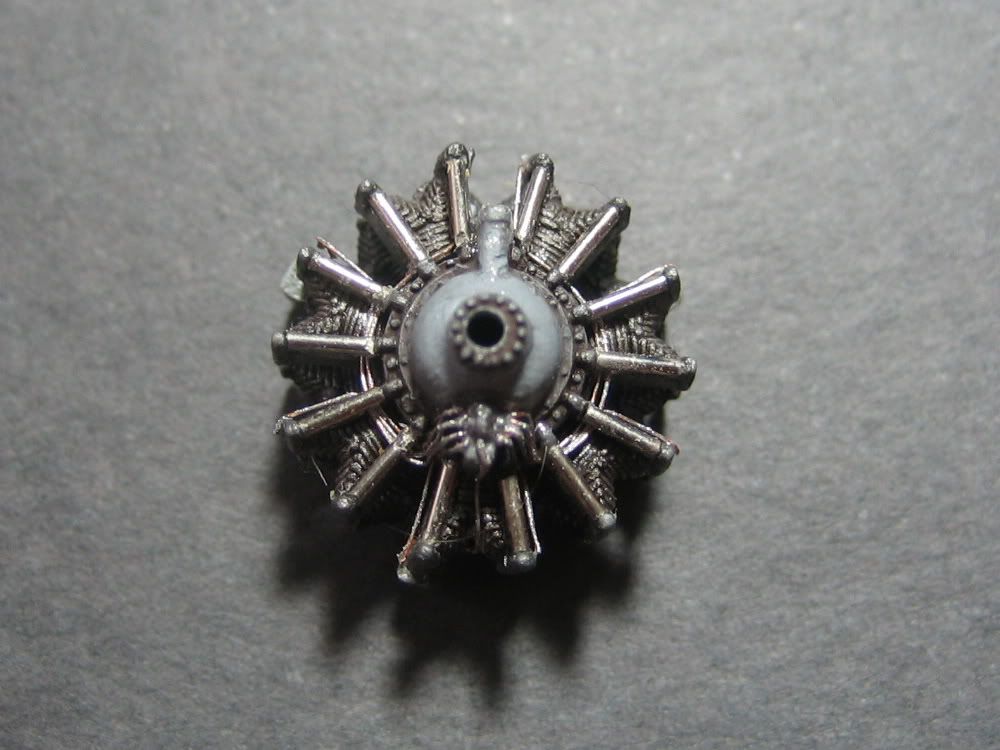
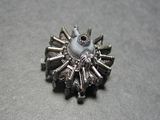
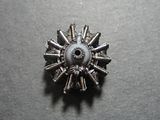
The engine was also modified. Actuator rods were removed and new were made along with some pipelines...
Regards,
Aleksandar
Posted: Wed Jan 13, 2010 4:50 am
by m.lacivita
I'm righ-click-saving this build for future reference. Very good find about the wrong propeller, I have to check my kit as I didn't realize that at first glance. Excellent idea to hollow the side framing, too. I'm just a little dubious about the shade of green you used, I would have used a grey instead. But that's not to be intended as a criticism on an excellent work!
Posted: Wed Jan 13, 2010 11:21 am
by Vincent Biondi
Hello Aleksandar,
Your model is looking great so far!
I really like the cockpit interior and seat belts.
Vincent.
Posted: Wed Jan 13, 2010 12:33 pm
by Adamello
Good job, Aleksandar, especially with the cockpit frame and those instrument bezels.

Kind regards,
Adam
Posted: Thu Jan 14, 2010 4:47 am
by warhawk
Thanks, glad you like it.
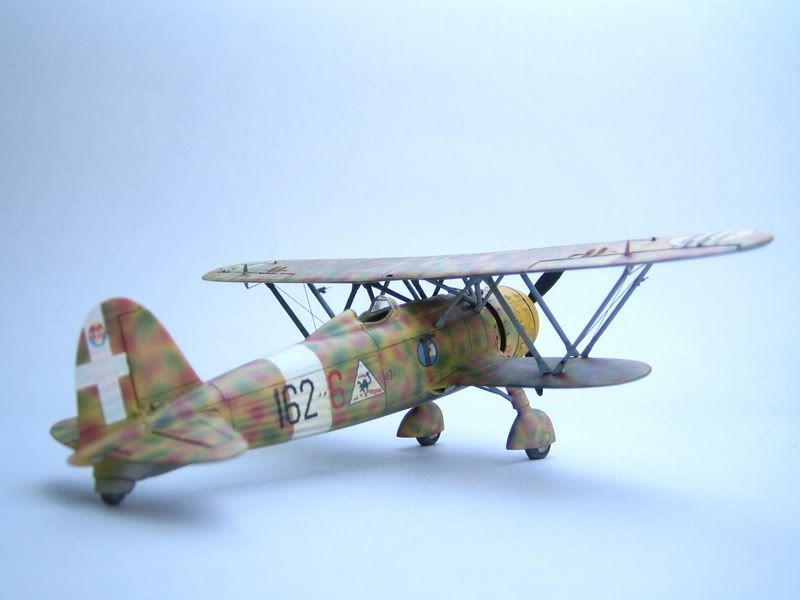
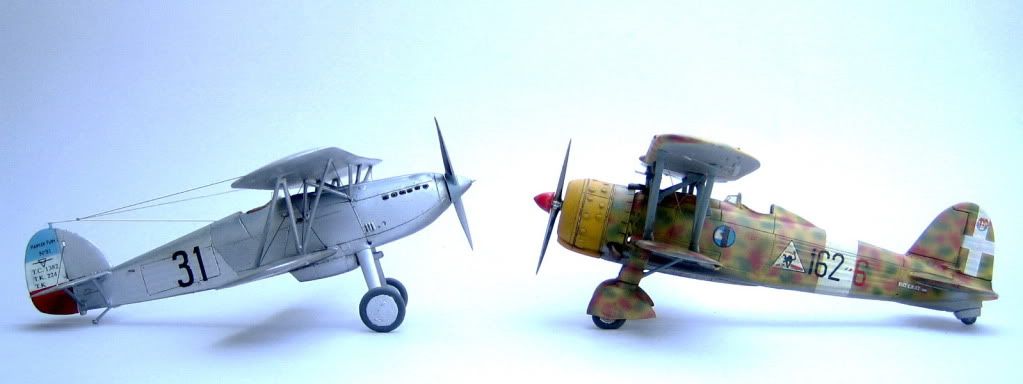
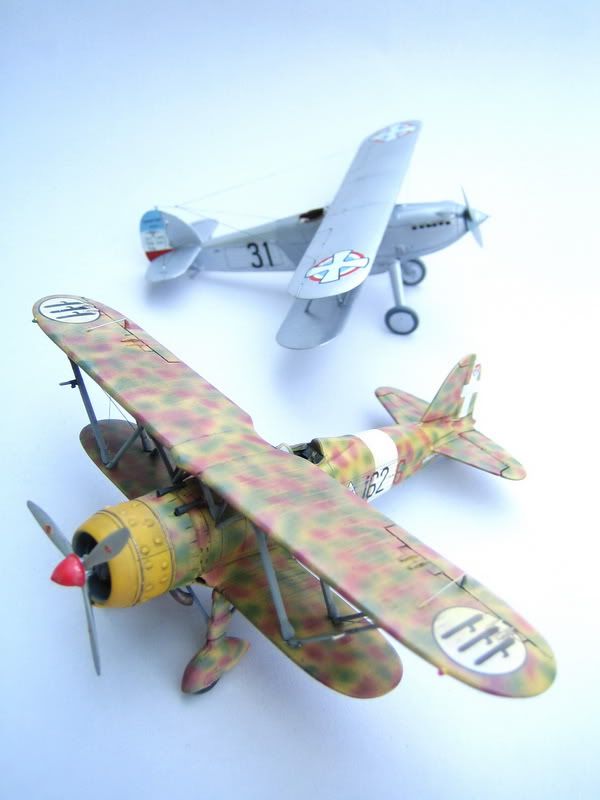
As far as the green interior is concerned, I am aware that it was probably gray, but I'm building the machine as preserved at Vigna di Valle museum (162a squadriglia), and i like how the cockpit looks with portions of it painted in green. A little detour from reality, but no one will know
Posted: Fri Jan 15, 2010 9:54 am
by GAJouette
Aleksandar,
Beautiful work my friend.Love the details,keep us posted to your progress.
Regards,
Gregory Jouette
Posted: Fri Jan 15, 2010 5:32 pm
by Editor
Great job on this scale. Instrument panel and cokpit frame nice done! Look forward to your updates.
Posted: Sun Feb 14, 2010 4:05 pm
by Luftwoller
Fantastic work especially on the IP. The bezels look great, ill nick that idea for future reference,
...Guy
Posted: Fri Jul 30, 2010 5:03 am
by warhawk
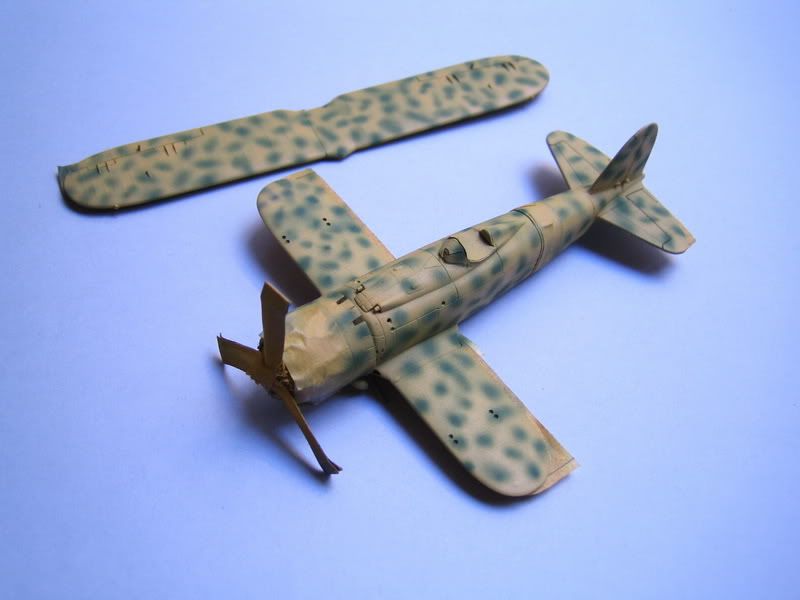
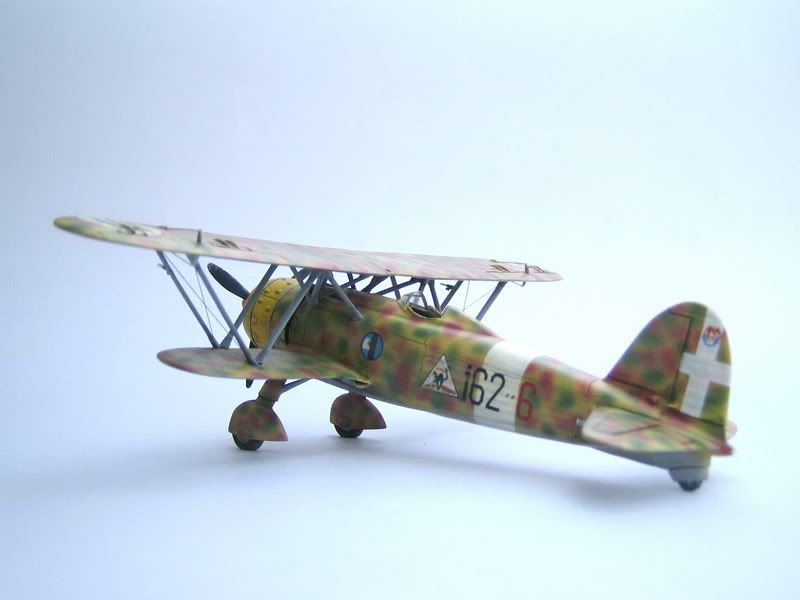
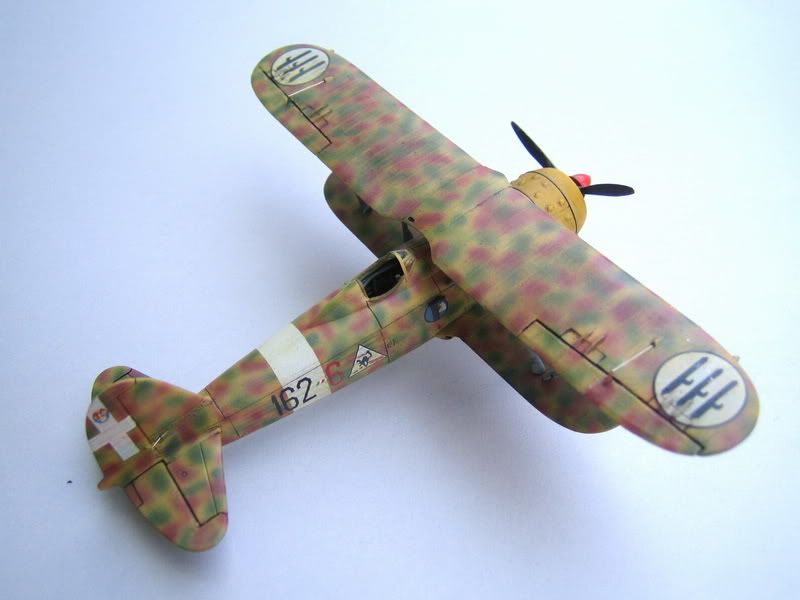
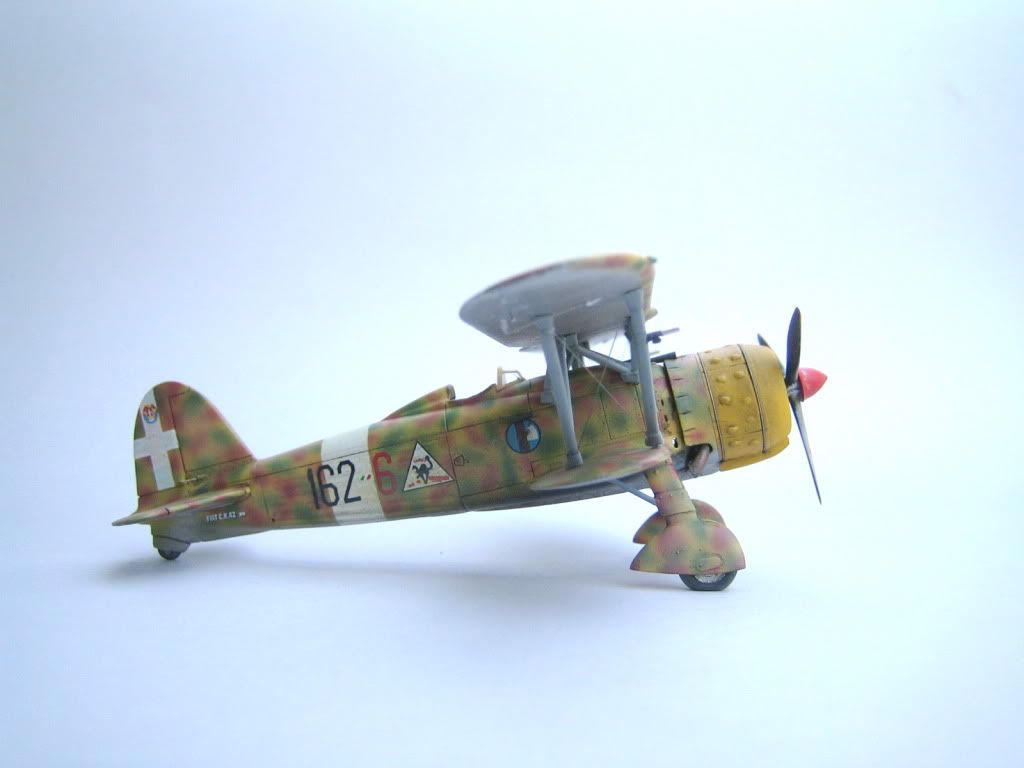
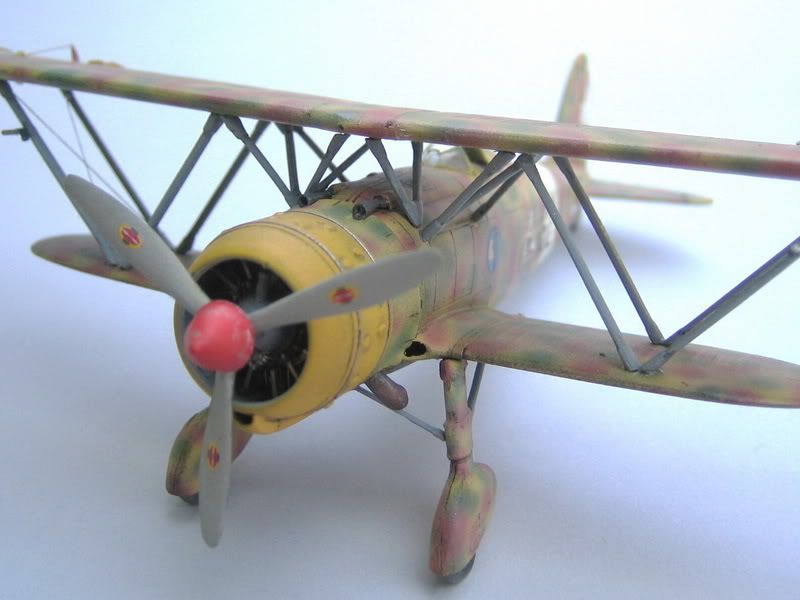
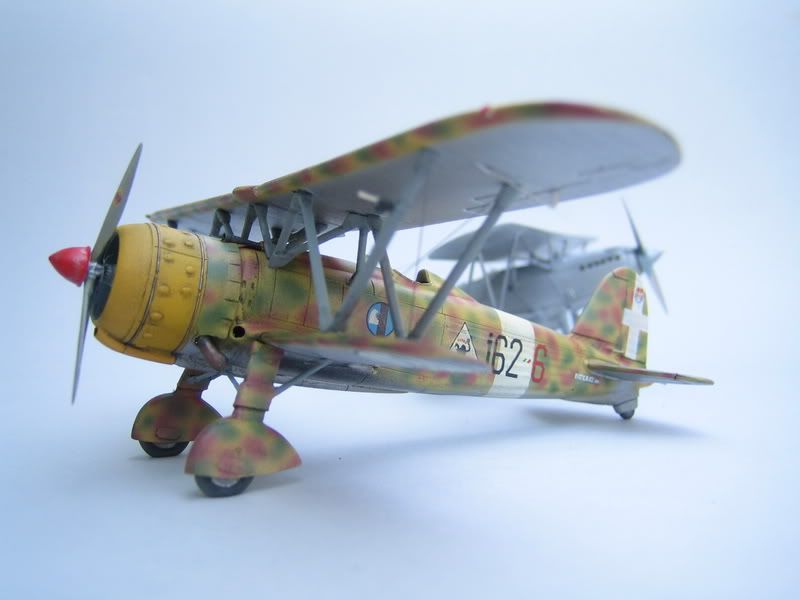
Well, I have finally passed all my exams, so let's get to the fun stuff - yes, CAMOUFLAGE!
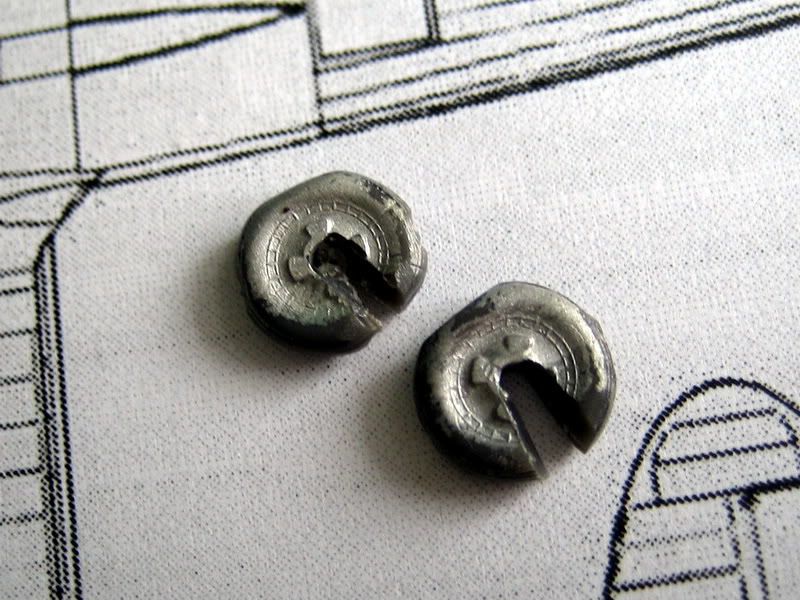
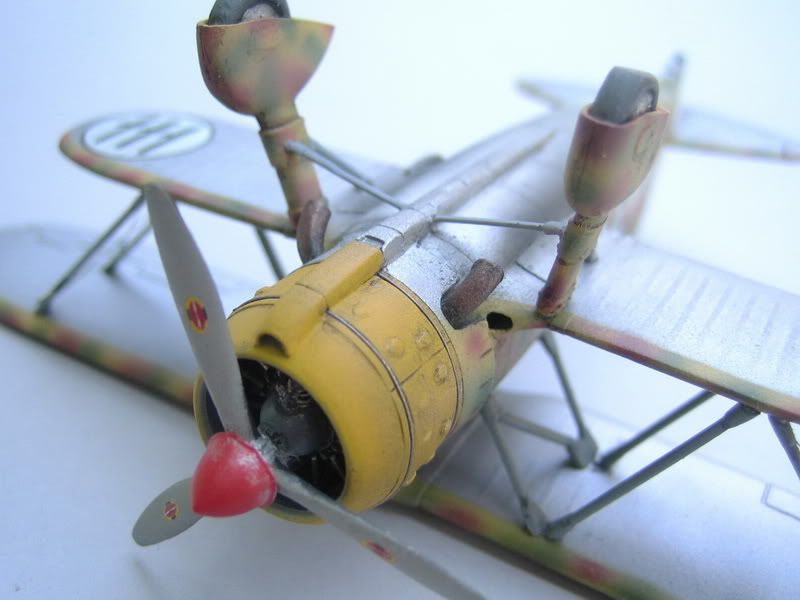
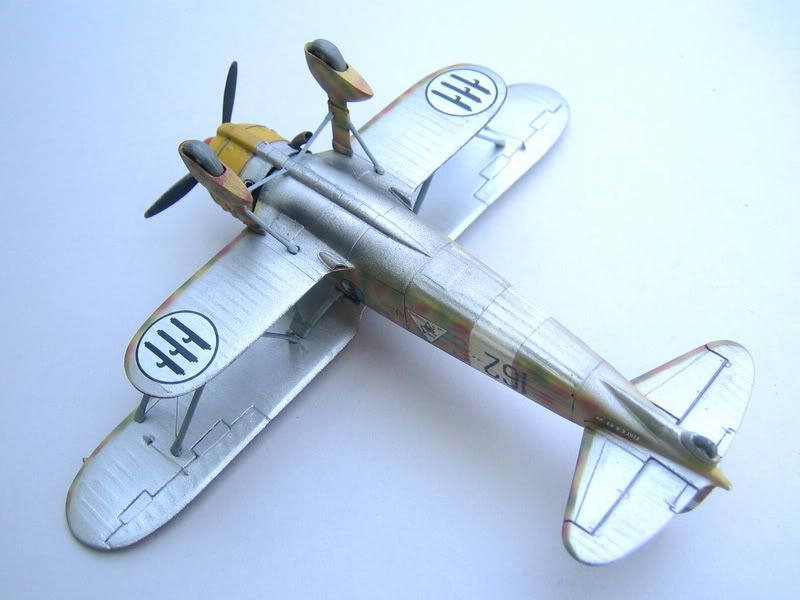
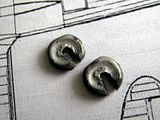
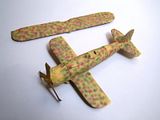
I drilled the holes in the struts for the wires. Wheels are cut in this way, so I could just slide them in at the end (I figured this would be easier than assembling them inside the "trousers" and masking them)
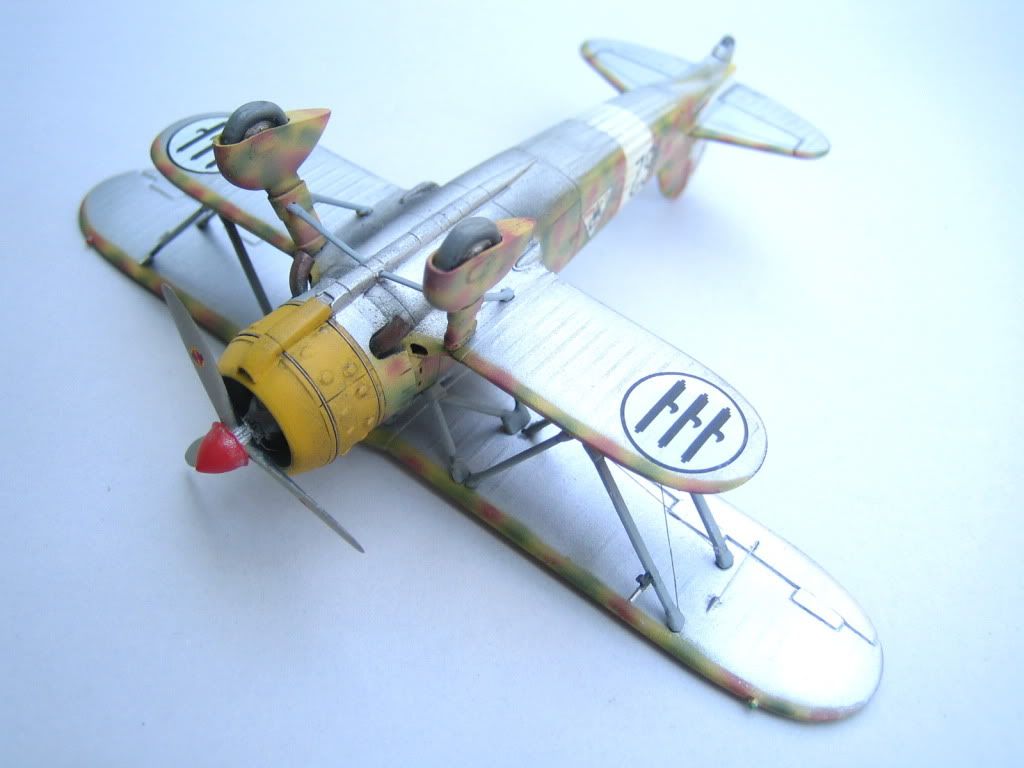
After priming I airbrushed the white fuselage band and painted the nose yelow. When dry, the undersides received a gloss black coat as a primer for the aluminum. Then I started masking for the upper cammo, which wraps around the leading edge and slightly onto the undersides. To achieve softer egde, I have distanced that edge of tape with some fishing line (you can see black threads through the tape)
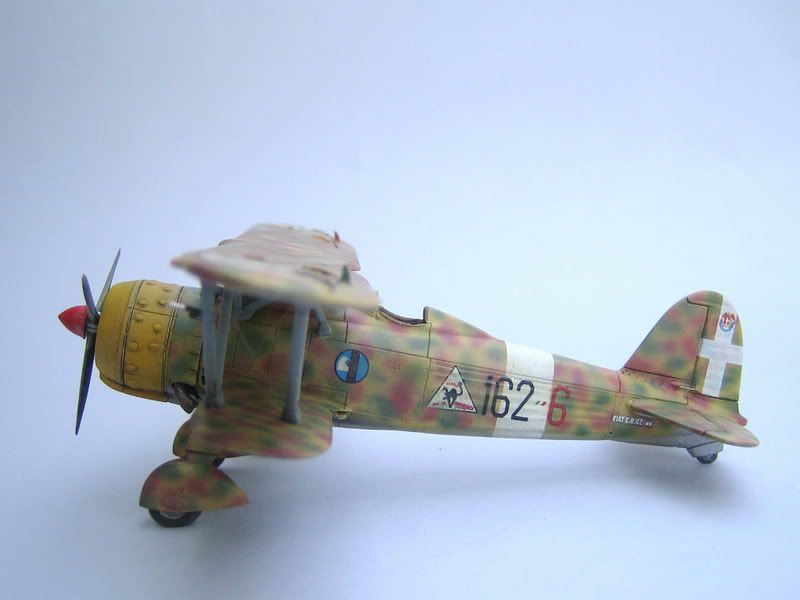
I chose standard 1941 cammo for my Fiat. When I was done with the green blotches, I sad "man, no way am I gonna fit brown between them". But highly thinned paint and lower pressure solved the problem... The mottles should be even smaller, but this is all I could do with my current airbrush.

Regards,
Aleksandar
Posted: Fri Jul 30, 2010 5:40 am
by Kubrt
Nice!
Posted: Sat Jul 31, 2010 11:50 pm
by Editor
Very nice work in a tough scale!
1/72 CR.42
Posted: Sun Aug 01, 2010 8:08 am
by Cjohn62
Aleksander, very nice work in this scale. I am especially impressed by what you did with the cockpit framework and the engine. Painting a mottled paint scheme in 1/72 can also be especially daunting. I use primarily a Pasche VL; what type of airbrush are you using?
Keep up the good work and be sure to post pictures of the competed project.
Chris
Shalimar, FL
Posted: Mon Aug 02, 2010 11:38 am
by warhawk
Thanks for the kind comments!

@Cjohn62: I used Revell's MasterclassPro with a medium nozzle (I haven't managed to find the fine one yet). The paint was diluted in about 60:40 ratio and pressure set to lowest.
Anyway, the final touches:
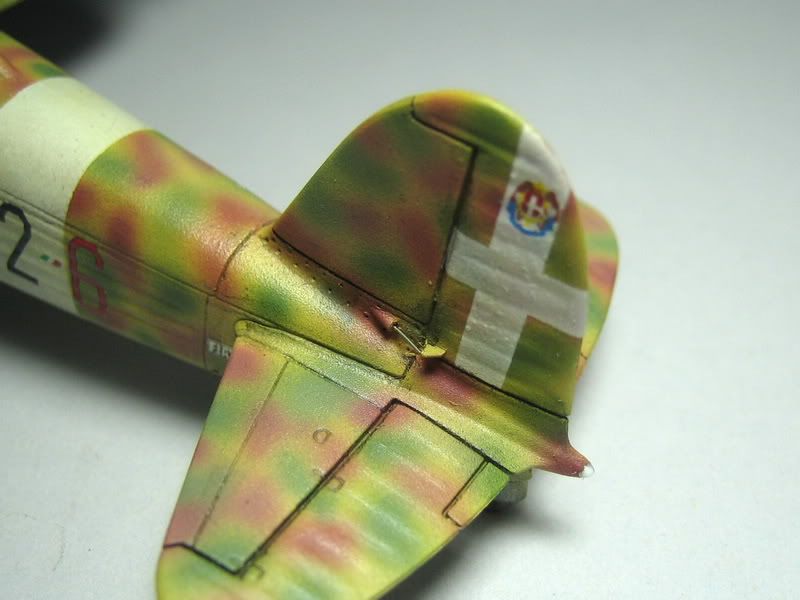
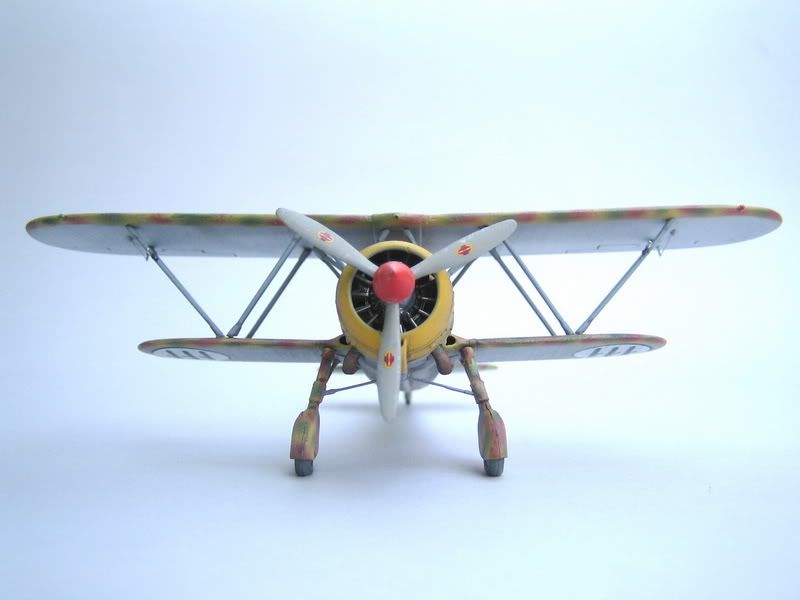
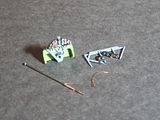
Added cowling strap cables made of wire, those panels were deepened quite a bit...
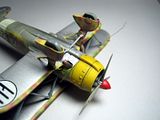
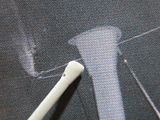
Rudder and aileron cables added, navigation lights scratchbuilt made with a drop of white wood glue (it dries clearly), wing colored lights made using the same method, except I mixed some acrylic paint with the glue...

Scratchbuilt gunsight...
And now for some other bits...
Cheers
Posted: Tue Aug 03, 2010 4:15 am
by warhawk
Posted: Tue Aug 03, 2010 11:25 am
by LazyCat
That worked out great!
Very nice detail