Fiat G.50, Special Hobby 1/48, Finland

Post in-progress or completed model pics here
User avatar
Kubrt
Comandante di Stormo
Posts: 92
Joined: Thu Apr 12, 2007 12:44 am
Location: Line near Pilsen, Czech Republic

Fiat G.50, Special Hobby 1/48, Finland

Post by Kubrt » Sun Jul 18, 2010 10:58 pm

Here are few pictures of my new fast built - Fiat G.50 in 1/48 scale from Czech producer Special Hobby. All panel lines are totally rescribbed and I must upgraded lower part of engine cowling and cover of engine filter... My work was about 30 hours long.

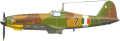
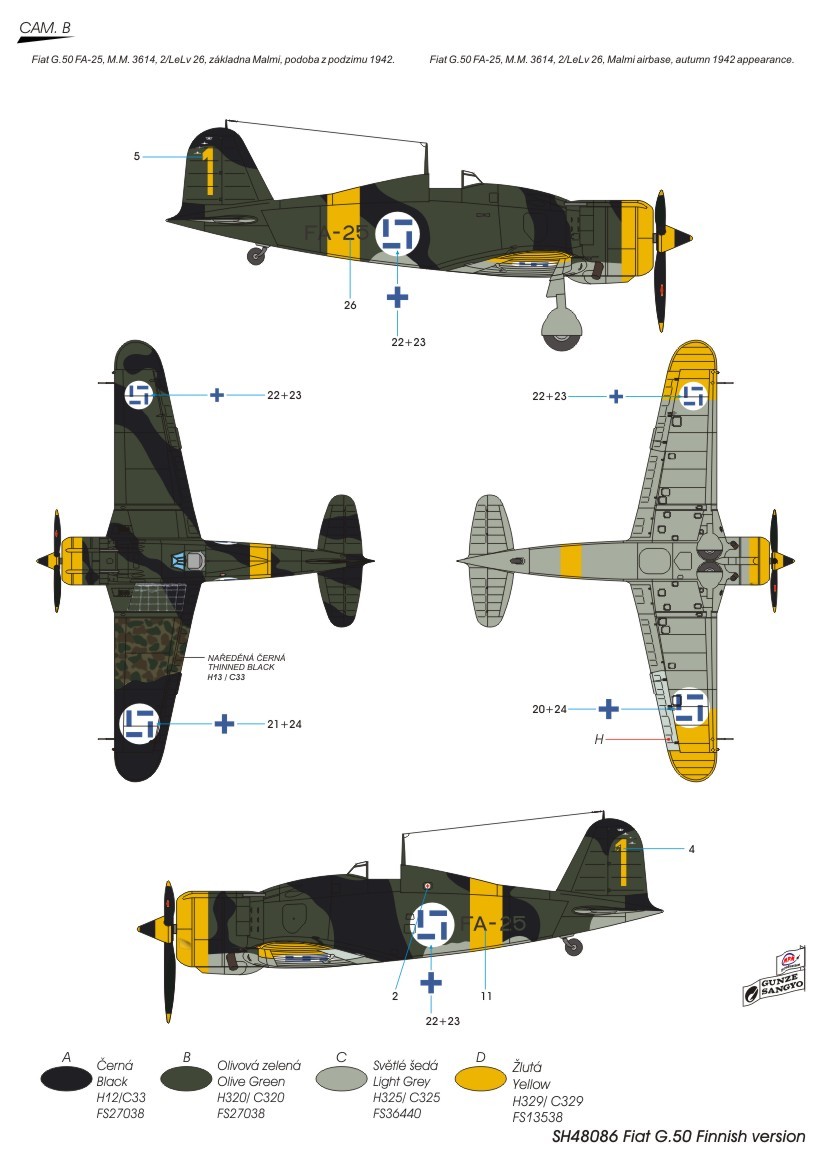
I have choosen aeroplane from Finland.

Image

Image

Image

Image

Upgraded of this area was really difficult...

Image

Image

Image

...to be continued...
Last edited by Kubrt on Sun Jul 18, 2010 11:11 pm, edited 1 time in total.
Jakub "Kubrt" Vilingr

User avatar
Kubrt
Comandante di Stormo
Posts: 92
Joined: Thu Apr 12, 2007 12:44 am
Location: Line near Pilsen, Czech Republic

Post by Kubrt » Sun Jul 18, 2010 11:03 pm

Engine cowling:

Image

Image

Image

Rear part of fuselage:

Image

..and of corse - my working battlefield :D :D :D

Image

...to be continued...
Jakub "Kubrt" Vilingr

shivadog
Comandante di Gruppo
Posts: 51
Joined: Thu May 01, 2008 1:49 pm
Location: Poland

Post by shivadog » Tue Jul 20, 2010 4:16 am

I'm also slowly fighting with that kit (double build together with PCM kit).
I found there is big mistake with canon bulges - they are much to the front, are You doing something with it? Is there anything else You're going to improve? The SH engine is also quite inacurate.
Did You chose specific finish plane?

User avatar
Kubrt
Comandante di Stormo
Posts: 92
Joined: Thu Apr 12, 2007 12:44 am
Location: Line near Pilsen, Czech Republic

Post by Kubrt » Tue Jul 20, 2010 3:24 pm

shivadog wrote:I'm also slowly fighting with that kit (double build together with PCM kit).
I found there is big mistake with canon bulges - they are much to the front, are You doing something with it? Is there anything else You're going to improve? The SH engine is also quite inacurate.
Did You chose specific finish plane?
I don´t improved bulges... All upgrades are done...
Jakub "Kubrt" Vilingr

User avatar
Kubrt
Comandante di Stormo
Posts: 92
Joined: Thu Apr 12, 2007 12:44 am
Location: Line near Pilsen, Czech Republic

Post by Kubrt » Tue Jul 20, 2010 3:30 pm

Here are some new pictures...

Together with B.239 Buffalo:
Image

First step - base white from GSI:
Image

Preparing of my own masks for masking of hakaristi...
Image

Image

Preparing of RLM 04 yellow - GSI Aqueous Hobby H 413 + 15% closs clear Tamiya X-22 + GSI Aqueou Hobby Thinner
Image

Yellow parts:
Image

Image

Image


...to be continued...
Jakub "Kubrt" Vilingr

Daniele Gatti
Comandante di Gruppo
Posts: 54
Joined: Sun May 09, 2010 12:44 am
Location: Piacenza - Italy

Post by Daniele Gatti » Wed Jul 21, 2010 12:38 am

Hi Kubrt!

Beautiful work!
Truly a masterful way of modeling!

Only a few questions..

Why did you do the interior in green?
The Fiat G.50 was the interior in a light gray primer..

About the shape of the seat as you solved?

Image

Thank you and keep! :wink:

User avatar
Kubrt
Comandante di Stormo
Posts: 92
Joined: Thu Apr 12, 2007 12:44 am
Location: Line near Pilsen, Czech Republic

Post by Kubrt » Wed Jul 21, 2010 12:55 am

To Daniele: Yes, I have color of interior in green interior color, it is my mistake :roll: Instructions from the model recommended by the interior color green paint... Seat may be in steel, but color of seat in my kit is green too :oops: . Fortunately, the cockpit is almost visible :D

New pictures will be in evening :wink:
Jakub "Kubrt" Vilingr

User avatar
Kubrt
Comandante di Stormo
Posts: 92
Joined: Thu Apr 12, 2007 12:44 am
Location: Line near Pilsen, Czech Republic

Post by Kubrt » Wed Jul 21, 2010 3:16 pm

Hi, lower surfaces are done 8)

Image

Image

Image

Image

Image

...to be continued...
Jakub "Kubrt" Vilingr

User avatar
Editor
Site Admin
Site Admin
Posts: 2194
Joined: Thu Jul 24, 2003 3:53 pm
Location: Canada
Contact:

Post by Editor » Wed Jul 21, 2010 7:51 pm

Beautiful, clean work, very sharp!

User avatar
Kagemusha
Comandante di Squadriglia
Posts: 28
Joined: Mon Oct 06, 2008 1:10 pm

Post by Kagemusha » Thu Jul 22, 2010 8:22 am

Very nice Kubrt, looking forward to more...

User avatar
Kubrt
Comandante di Stormo
Posts: 92
Joined: Thu Apr 12, 2007 12:44 am
Location: Line near Pilsen, Czech Republic

Post by Kubrt » Thu Jul 22, 2010 1:28 pm

Here are remains of italian camouflage:

Lifecolor Primer (I have used for thinning primer and paints mixture of original Lifecolor thinner with adding of 20% thickener):
Image

Preshading with Lifecolor Brown color:
Image

Lifecolor Sand color:
Image

Base for splotches:
Image

Green splotches:
Image

Brown splotches:
Image

and final result:
Image

...to be continued...
Last edited by Kubrt on Thu Jul 22, 2010 10:45 pm, edited 1 time in total.
Jakub "Kubrt" Vilingr

User avatar
LazyCat
Comandante di Stormo
Posts: 93
Joined: Sat Dec 19, 2009 4:11 pm
Location: Greensboro, NC

Post by LazyCat » Thu Jul 22, 2010 1:52 pm

Kubrt wrote:Here are remains of italian camouflage..

Lifecolor Sand color... Green splotches ... Brown splotches...

This looks great Kubrt!

Can you be more specific as far as colors?
I'm starting to use Lifecolor and any advice will be very appreciated!
What do you need Thickener for?
Wait, watch, listen, then pounce!

User avatar
Kubrt
Comandante di Stormo
Posts: 92
Joined: Thu Apr 12, 2007 12:44 am
Location: Line near Pilsen, Czech Republic

Post by Kubrt » Thu Jul 22, 2010 10:43 pm

LazyCat wrote:
This looks great Kubrt!

Can you be more specific as far as colors?
I'm starting to use Lifecolor and any advice will be very appreciated!
What do you need Thickener for?
I have used only "aproximate" shades of sand, green and brown, but doesn´t matter, because it is only base for thinned black wash...

Look at my camouflage on Fiat ;-)

http://www.cmkkits.com/res/data/071/008448.jpg?seek=8

I have used for thinning mixture of original Lifecolor thinner with adding of 20% thickener - this is thinner for thinnig primer and colors!

Original Lifecolor Primer is indispensable for airbrushing Lifecolor paints!

1. step: base coat with Lifecolor Primer thinned with mixture original Lifecolor thinner with 20% of Thickener

2. step: airbrushing of camouflage colors thinned with mixture of original Lifecolor thinner with 20% of Thickener

:wink:
Jakub "Kubrt" Vilingr

Daniele Gatti
Comandante di Gruppo
Posts: 54
Joined: Sun May 09, 2010 12:44 am
Location: Piacenza - Italy

Post by Daniele Gatti » Fri Jul 23, 2010 1:32 am

It's superb Kubrt! :o

User avatar
Kubrt
Comandante di Stormo
Posts: 92
Joined: Thu Apr 12, 2007 12:44 am
Location: Line near Pilsen, Czech Republic

Post by Kubrt » Sun Jul 25, 2010 5:06 am

I have reconsidered my choice of camouflage on Fiat G.50

Image

:lol: :lol: :lol:
Jakub "Kubrt" Vilingr

Post Reply