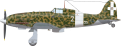
Macchi Veltro - First Airplane Kit in Progress

Post in-progress or completed model pics here
User avatar
Adamello
Comandante di Gruppo
Posts: 51
Joined: Sun Oct 05, 2008 10:48 am
Location: Prague, Czech Republic

Post by Adamello » Wed Jun 10, 2009 12:52 am

Well, I picked up a template and a scriber and did my best on the oval hatches on the wings. I am not completely satisfied with them, but they're not bad for a beginner and I don't want to fill them in and do them over (at the moment, anyway).

Image

I also sprayed the area inside the wheel wells as well as the gear doors below. I am considering doing some of the landing gear itself from scratch as Eduard didn't do such a good job in their interpretation (people who have used the Eduard set and are familiar with what the gear really look like will know what I am talking about).

Image

Now, back to the left side of the cockpit...

Thanks for looking and kind regards,

Adam
Adam Goloda

Editor
Site Admin
Site Admin
Posts: 2362
Joined: Thu Jul 24, 2003 3:53 pm
Location: Canada
Contact:

Post by Editor » Wed Jun 10, 2009 9:31 am

Clean job and sharp looking so far. Look forward to watching your progress.
Image

User avatar
stefanuccio
Generale di Brigata Aerea
Posts: 187
Joined: Sat May 02, 2009 6:19 pm
Location: cape town south africa

Post by stefanuccio » Wed Jun 10, 2009 4:18 pm

hello Adamello
looks good so far i am also waiting to see more
ciao stefano

User avatar
Adamello
Comandante di Gruppo
Posts: 51
Joined: Sun Oct 05, 2008 10:48 am
Location: Prague, Czech Republic

Post by Adamello » Fri Aug 07, 2009 12:43 pm

Hi everyone,

I haven't been making much progress on my Veltro, but it's not from lack of trying. I have made several attempts at scribing the proper hatches, with this being the latest result. It needs cleaning up, but I think it will suffice.

Image

Also, the cockpit now contains everything except the seat, which I will put in the plane later. I added some plumbing to the oxygen tank, changed the trim wheel (for one made from combining the spindle from the FM Details photo-etched wheel and the rim from the kit wheel), and added the rudder bar.

Image

Image

Image

I hope to have the hatches done and the cockpit permanently inside the fuselage by the end of this year. :)

Kind regards,

Adam
Adam Goloda

User avatar
jrlucero
Comandante di Stormo
Posts: 114
Joined: Mon Nov 06, 2006 2:21 pm
Location: Guatemala

Post by jrlucero » Sat Aug 08, 2009 7:25 pm

Great job Adamello! The cockpit is looking sharp. Watch out for joins on the back of the Macchi, a good set of plans really comes in handy when reescribing details.

Best regards,
Just build it!

José Lucero

Working on:
1/35 Autoblnda AB.41
1/48 P-47D Brazilian Jambock Squadron Senta Pua!

Editor
Site Admin
Site Admin
Posts: 2362
Joined: Thu Jul 24, 2003 3:53 pm
Location: Canada
Contact:

Post by Editor » Sat Aug 08, 2009 7:52 pm

Great work and attention to detail!
Image

User avatar
gruson
Comandante di Stormo
Posts: 74
Joined: Fri Jun 12, 2009 5:20 am
Location: France

Post by gruson » Thu Sep 17, 2009 5:25 am

Hello,
it's a very great job !
I look with interest !

Best regards

User avatar
Adamello
Comandante di Gruppo
Posts: 51
Joined: Sun Oct 05, 2008 10:48 am
Location: Prague, Czech Republic

Post by Adamello » Tue Sep 22, 2009 4:41 am

Well, I am continuing at my blistering pace :), with my beginner's luck unfortunately seeming to be running out.

I have glued the fuselage halves together, which was a bit of an ordeal as one side was warped and they didn't fit together well at all.
This caused a couple of problems, most notably with the piece that fits into the top of the nose section (there is glue in the seams at the front and it doesn't look clean)
and the area just in front of the cockpit (there is a noticeable depression).

The scribing of the hatches behind the cockpit looks even worse than before, so I will fill part of it and try again.

I am very pleased with the cockpit itself.

Here are some photos:

Image

Image

Image

Image

Image

Image

Image

Any suggestions as to how I can fix the problem areas would be greatly appreciated.

Kind regards,

Adam
Adam Goloda

User avatar
Kubrt
Comandante di Stormo
Posts: 92
Joined: Thu Apr 12, 2007 12:44 am
Location: Line near Pilsen, Czech Republic

Post by Kubrt » Tue Sep 22, 2009 9:18 am

Niiiiice :D
Jakub "Kubrt" Vilingr

Jan Kotas
Comandante di Gruppo
Posts: 52
Joined: Mon Jun 23, 2008 12:09 am
Location: Prague, Czech Republic

Post by Jan Kotas » Tue Sep 22, 2009 12:32 pm

Hi Adam
my suggestion for the pre-cockpit area is tu use a "cyanoacrylate" glue and then just sharpen it with a sandpaper. Then u shall re-new clutches and rivets. Same u can use while u will revise section behind the cockpit.
Good luck and take it easy....
Jan

User avatar
Adamello
Comandante di Gruppo
Posts: 51
Joined: Sun Oct 05, 2008 10:48 am
Location: Prague, Czech Republic

Post by Adamello » Tue Sep 22, 2009 10:32 pm

Thank you, Jan. I will give it a try.

Kind regards,

Adam
Adam Goloda

User avatar
Luftwoller
Comandante di Stormo
Posts: 122
Joined: Thu Sep 10, 2009 9:16 am
Location: Bournemouth UK

Post by Luftwoller » Sun Sep 27, 2009 2:16 pm

Hi, that cockpit is a stunner. Really impressed with your work so far. Scribing is not one of my favourite jobs, but i find if you do small bits at a time with a good straight edge to work against, it gets there in the end.
Looking forward to your next update.
...Guy
'Your a disgrace to the male Genus, I'm ashamed to call myself Homo!'.......Hubert J Farnsworth (Futurama)

User avatar
Adamello
Comandante di Gruppo
Posts: 51
Joined: Sun Oct 05, 2008 10:48 am
Location: Prague, Czech Republic

Post by Adamello » Wed Jan 06, 2010 5:42 am

Happy New Year, everyone.

I have done very little on the Veltro in the last few months, but here are a few pictures anyway:

I took Jan Kotas's advice and redid the area in front of the cockpit. My sanding pretty much wiped out the detail, but I attempted to recreate it.

Image


I had intended to use the SkyModels wheelwell covers, strange as they are, but in the end, with my modification of the PE to look more like the real thing,
the cover piece will simply not fit properly. So I've only used the resin firewall (cut to fit) and my plan is to install an engine and all of the associated
spaghetti that goes along with it. :shock:

Image


And here are some bits and pieces. I made a seat cushion from Milliput, but it is a little on the small side and will be redone before being painted black.
The headrest still needs to be painted VA (I haven't decided if I should paint the seat or leave it the way it is). Also, I made a replacement pitot tube
from brass tubing which can be seen alongside the kit piece.

Image


I am currently struggling with scratchbuilding pieces of the landing gear.

More to come after the spraying season starts. :)

Kind regards,

Adam
Adam Goloda

Editor
Site Admin
Site Admin
Posts: 2362
Joined: Thu Jul 24, 2003 3:53 pm
Location: Canada
Contact:

Post by Editor » Wed Jan 06, 2010 9:17 am

Happy New Year to you also :)

Nice clean work, look forward to seeing the completed model.
Image

User avatar
Mirek Riha
Generale di Brigata Aerea
Posts: 286
Joined: Fri Nov 03, 2006 12:49 am
Location: Prague, Czech Republic

Post by Mirek Riha » Wed Jan 06, 2010 11:35 am

Hi Adam,

I am glad that you carrying on. I hope to see the finished model in september at the E-day. You'll be very welcome.

Mirek

Post Reply