|
SMER 1/50 Ansaldo S.V.A. 5 World War I Reconnaissance Aircraft by Davide Splendore 
|

|


|

Click the STORMO! Eagle to return to the Gallery |
|
After a flight of 3.5 hours, eight planes of the L'Aviazione Italiana 87a Squadriglia appeared in the sky over Vienna at 9.20 am on August 9, 1918. For half an hour the planes flew in close formation over the Austrian capital, dropping leaflets and taking photographs. At 12:40pm, seven of the eight S.V.A.s returned to their base at San Pelagio. They had flown more than 620 miles (1,000 km), almost 500 (800) of them over enemy territory. The plane flown by Lieutenant Giuseppe Sarti had engine trouble and had to land near Wiener-Neustadt just outside Vienna. This flight was arranged by the poet Gabriele d'Annunzio. One of the S.V.A. 5s had been modified from a single-seater into a two-seater to accommodate d' Annunzio and the pilot, Captain Natale Palli. The other planes were all single-seaters. An extra 66-gallon (300-litre) fuel tank had to be installed for this flight. Much of the S.V.A.'s renown is linked to that peaceful air raid over Vienna, but the plane was outstanding in its own right. It was generally considered one of the war's best light bomber and reconnaissance planes. It was designed by Umberto Savoia and Rodolfo Verduzio, with the assistance of Celestino Rosatelli, who was later to design many famous planes himself. The prototype made its first flight on March 19, 1917. In military evaluation trials, it proved to be very fast and strong, but not sufficiently manoeuvrable (the preference of Italian pilots) to make it a fighter plane. As a result, the S.V.A. was assigned to reconnaissance duty. The first version was the S.V.A.4, which was followed by the S.V.A.5. The main difference between the two models was the fuel capacity (four hours endurance for the S.V.A. 4, six for the S.V.A. 5) and the armament. In service from February 1918, the single-seater S.V.A. equipped six reconnaissance squadrons. Its performance was excellent, and the plane completed many outstanding flights, carrying out such exceptional missions including the reconnaissance flight of Locatelli and Ferrarin over Friedrichshafen on May 21, 1918, a flight of about 435 miles (700 km). Two new versions of the plane were developed at the same time, both of them two-seaters: the S. V.A.9 and the S.V.A. 10. The S.V.A.9, a trainer, was without armament had double controls and had a shorter range than the S.V.A.5. The S.V.A.10 was designed for armed reconnaissance and light bombing, and went into action during the last months of the war. About 2,000 S.V.A.s. were built, and they saw service until the 1930s. In 1920 Ferrarin and Masiero flew an S.V.A. from Rome to Tokyo. References [1] Angelucci E. and P. Matricardi, "World Aircraft, Origins – World War I", Sampson Low Guides, 1977
|
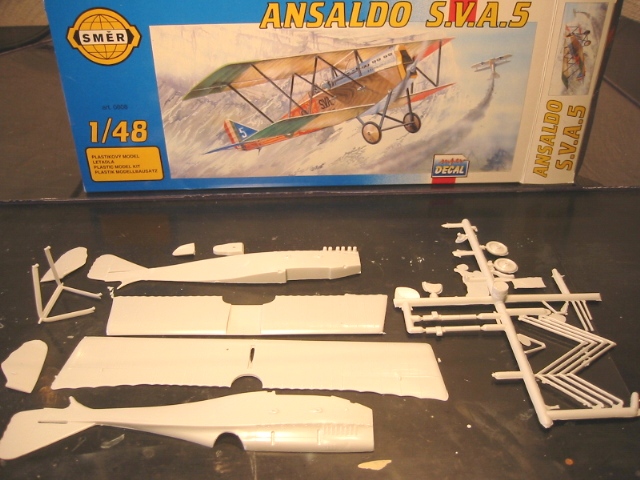
The Kit I’ve always had a fascination for this plane ever since I visited the museum of Gabriel D'Annunzio as a child. I had always planned on building a model of this wonderful aircraft, however until now I hadn’t found a kit, on which occasion recently, on display in the window of a famous hobby store in Rome, I saw the SMER kit ... and for a paltry price I purchased the kit. As soon I returned home I began the project in earnest and I must say that, unfortunately the kit was of less than optimal quality. The plastic is particularly soft and the detail is only approximate, however with a little patience most of the defects can be remedied and the kit can be transformed into an acceptable model.
Construction To begin it was necessary to make a few modifications to the fuselage halves. The exhausts were eliminated which are obviously oversized, and the rudder was detached which would be repositioned later. 

Obviously, the entire cockpit interior was scratch built with plasticard and wire. The instruments were drilled out and new instruments added from extra frets. 


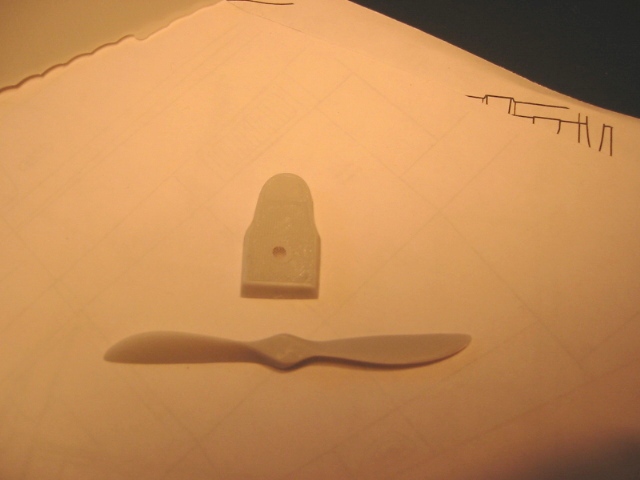
At the same time, the propeller blade was puttied and sanded and prepared for painting. Meanwhile, the radiator was modified slightly using ‘bomboniera’ to simulate the complex radiator-cage seen on the original airplane.
Prior to assembling the fuselage halves, it is necessary to paint the interior sides to reproduce the effect of wood. To model the wood grain effect, it was necessary to apply a base of light ochre in which were then applied 3 layers of Vallejo “woodgrain” by hand, with expressed aim of capturing the grain-effect. The same procedure was applied to the propeller blade using a darker shade of woodgrain. 


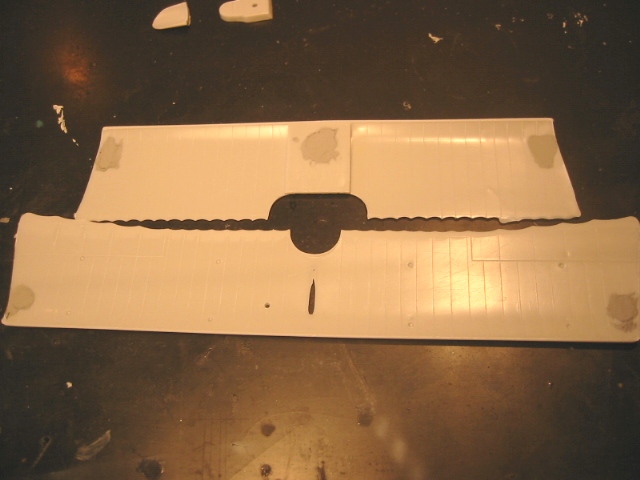
The fuselage halves were then glued together and the process moved to preparing the wings. Here it was necessary to sand and putty ejectors points.
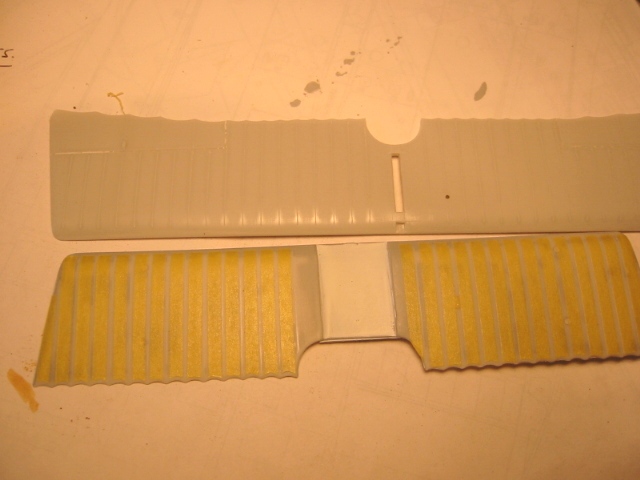
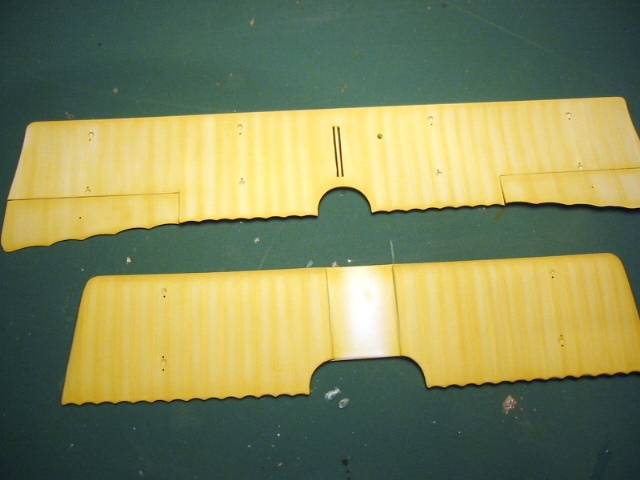
The effect of the wing ribs are not convincing, and I decided to reproduce the correct effect from actual photos using a rather laborious but effective procedure. I applied strips of adhesive tape in such a way leaving the area around the ribs exposed.
I then applied Tamiya putty, and once dry I removed the adhesive tape. The result are parallel lines of putty corresponding to each rib. 

At this point I removed ailerons and drilled 0.2mm holes for the lines to the control horns. Moving to the tail planes, the ribbing effect is almost nonexistent. Using a photo/profile of the original tail section and sanding this area, the corrected tail planes are shown below. The left side tail plane is the original kit supplied part and the corrected tail plane is shown next to it on the right side of the photo. The rudder and the left and right side corrected tail planes are shown in the following photos. 

To finish all this preparation, white putty was applied liberally around the entire model to flatten the many injector points and to provide a light base for painting. 


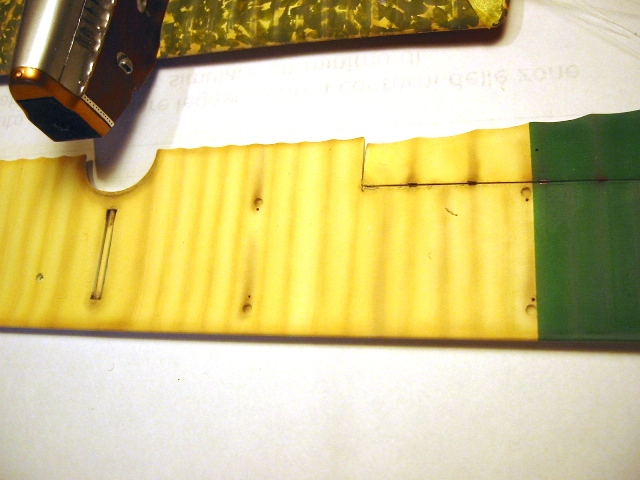
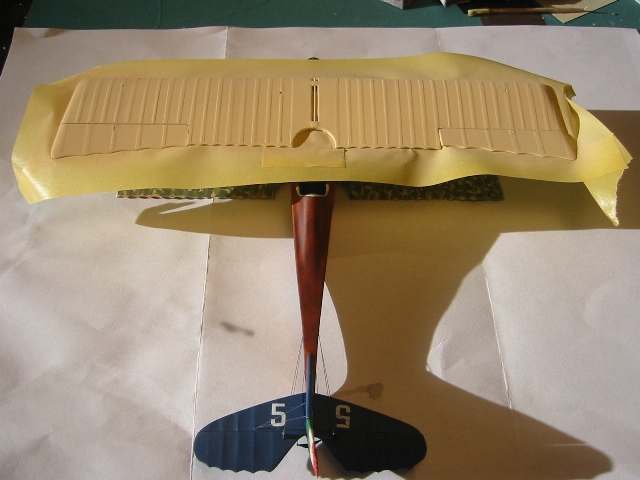
Paint Now to painting. The wings were sprayed with a light ochre color to simulate fabric. The paint was applied primarily along the ribs to give some depth.
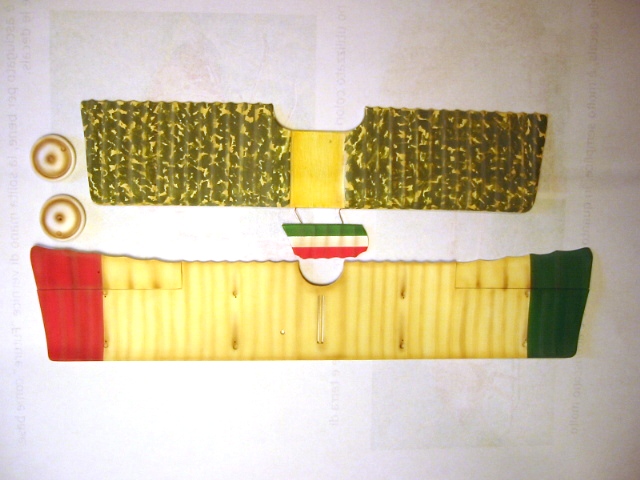
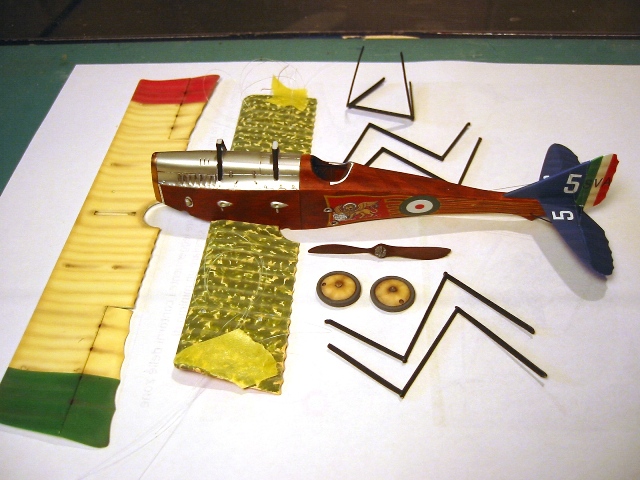
On the undersides of the wings only, the Italian tricolors were applied, always spraying darker/heavier shades around the ribs. 

Painting the tricolors was ended with every rib sprayed lightly with a diluted dark shade of brown in order to give a deeper impression and to highlight the effects of the work done on the ribs. On the real aircraft (at Vigna) the ribs are virtually transparent through the cloth covering, after-shading captures this effect well.
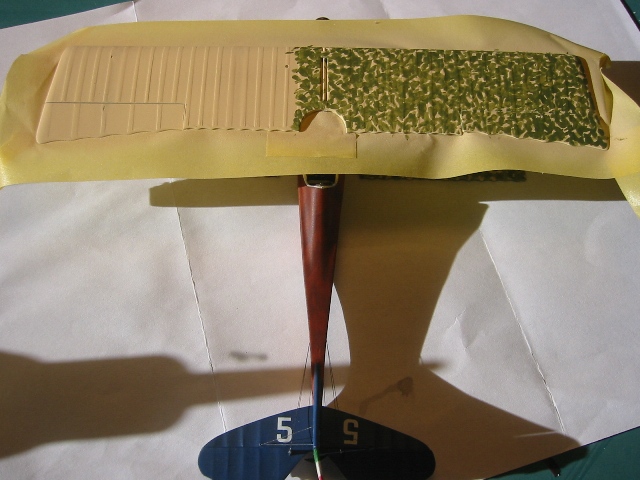
On the topside wing the camouflage was reproduced with gentle hand brushing using grass green, as was done with the actual aircraft. 

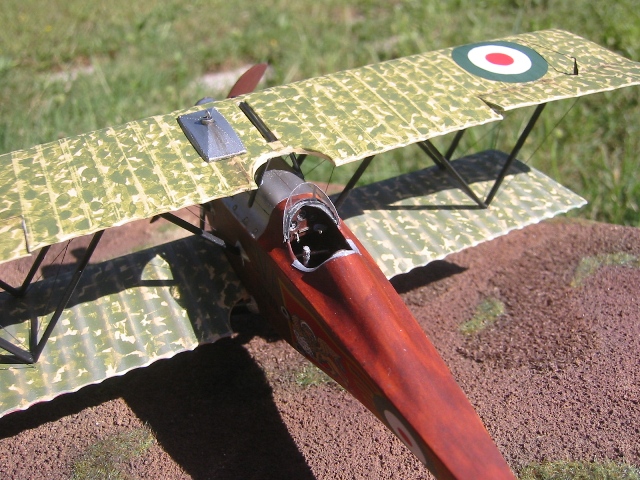
Here is the final result, with a light spray of clear to tie in elements of the camo scheme.
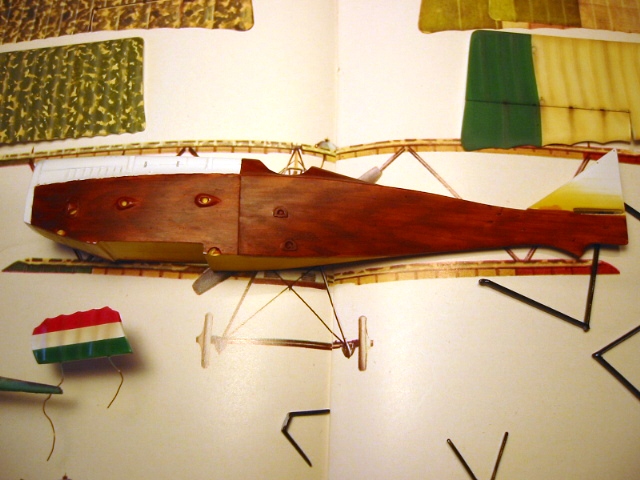
On to the fuselage, the procedure begins with an irregular hand application of ochre, upon which was applied, by hand again, diluted Vallejo “woodgrain”, spreading the paint along the grains of wood. The real plane was constructed using various panels of wood. The different panels were simulated by varying the shades of woodgrain. The upper engine cowling was painted last using Alcad Dark Aluminum. 


The bottom wing was not painted immediately because of the need to fill obvious gaps.
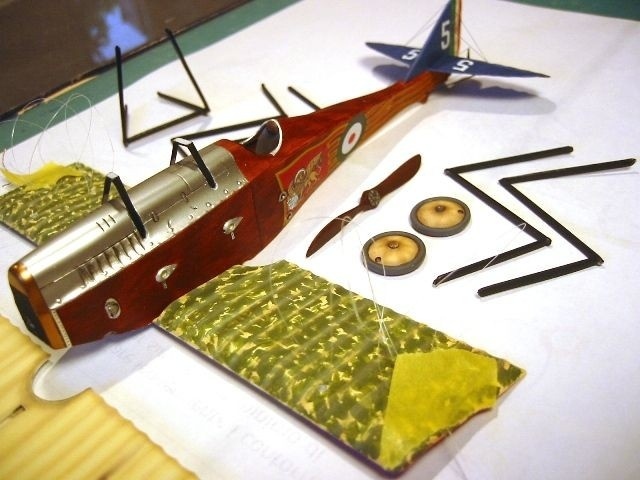
The kit provided wheels are not acceptable and were substituted with resin ones from another kit, and were painted and assembled separately. 

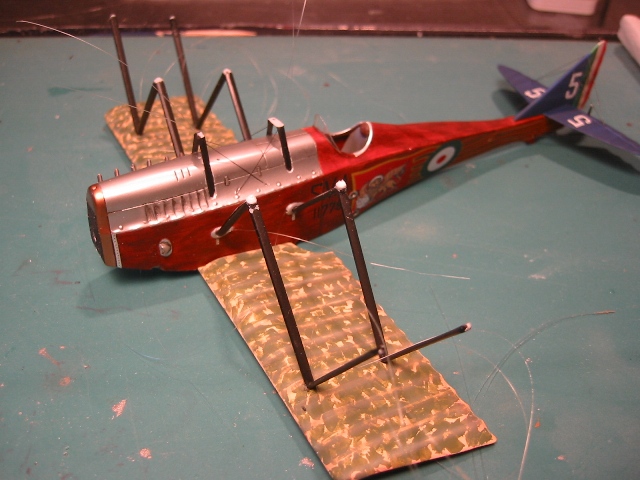
The final parts assembly could now begin. I now applied the rigging, beginning with the lower wing using nylon 0.10 thread. The lower wing was then attached followed by the upper wing.
For convenience, the decals were applied to the fuselage and onto the tail planes. The decals applied well and are good quality.
At this point, parts were assembled onto the fuselage and lower wing. Once dry, the top wing was glued. This phase was the most complicated, for all biplanes since alignment of the struts is critical.


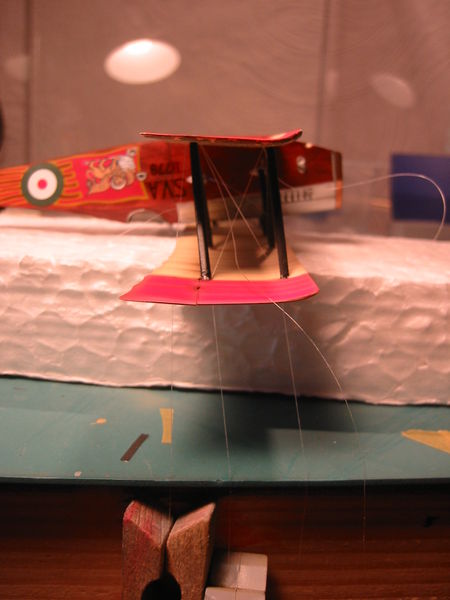
Finally the rigging was applied through the top wing, applyig tension using clothes pins and applying 'microgoccia di attak' on the outside of the locating holes.
Excess thread was removed using a razor blade, and filling remaining gaps/holes to conclude this operation. 

A base color that was applied to the top wing indicated additional touch ups were necessary.
Continuing to paint the top wing as the lower one. This concluded the end of painting the model.
The landing gear was prepared separately, allowing time for nylon rigging attachments to cure, these acted as shock absorbers on the real aircraft. Remaining decals and other small accessories completed the task of finishing the model. A final application of clear gave the appropriate finish. The only area that didn’t receive a clear was the aluminum cowling. At the end of this job, below are the final results. A most satisfying build. Buon modellismo.


|
Aircraft: Ansaldo S.V.A.5 Manufacturer: Societa Giovanni Ansaldo Type: Reconnaissance Year: 1918 Engine: S.P.A. 6A 6-cylinder liquid-cooled inline, 220 hp Wingspan: 29 ft 10.25 in (9.1 m) Length: 26 ft 7 in (8.1 m) Height: 10 ft 6 in (3.2 m) Weight: 2,315 lbs (1,050 kg) Maximum Speed: 143 mph (230 km/h) Ceiling: 21,980 ft (6,700 m) Range: 6 hrs Armament: 2 machine guns Crew: 1 Aircraft: Ansaldo S.V.A. 9 Manufacturer: Societa Giovanni Ansaldo & Compagnia Type: Reconnaissance Year: 1918 Engine: S.P.A. 6A 6-cylinder liquid-cooled inline, 220 hp Wingspan: 29 ft 10.25 in (9.1 m) Length: 26 ft 7 in (8.1 m) Height: 9 ft 7 in (2.92 m) Weight: 2,293 lbs (1,040 kg) Maximum Speed: 137 mph (218.8 km/h) Ceiling: 16,405 ft (5,000 m) Range: 4 hrs Armament: --- Crew: 2 |
|
|
|
|
|

|
|
|


|


|
|
|
|
August, 2007 STORMO! © 2007 |